

How to do keratin straightening?
We explain everything to you step by step.
Keratin straightening is very trendy, it straightens your frizzy, curly or unruly hair while giving it shine and suppleness thanks to keratin. Having nourished hair, as soft as silk, and being able to style it easily every day, that's the goal of this straightening technique. How to do keratin straightening ? How much does it cost? What type of hair is suitable for this hairstyle? What are the contraindications? Do you want to know everything about Brazilian straightening before doing it ? Follow the Horus Hair guide.
What is keratin straightening and what are its contraindications? Is it suitable for all hair types?
SPECIFICITIES OF KERATIN SMOOTHING: THE COMPONENTS OF THIS TRENDY HAIR TECHNIQUE
Keratin smoothing is a technique that aims to rebuild the hair fiber by providing it with the missing keratin. This natural protein composed of amino acids is the main component of hair that allows it to grow. Due to external aggressions, such as pollution, but also diet, stress and illness, our appendages (hair, nails, skin) become dehydrated and a keratin deficiency affects our hair.
After extensive research and testing on different hair types, the smoothing effect in the form of a treatment enriched with keratin has been proven. This protein nourishes the hair in depth, while giving it a silky appearance that is pleasant to the eye and to the touch. No more need to detangle your hair every day or style it for hours!
To achieve this result, simply fix these regenerating proteins on the hair, making it smoother thanks to the heat of the hair straightener . You can do a keratin straightening at home by getting our kit here.
HOW LONG DOES A KERATIN STRAIGHTENING LAST? IS IT THE SAME AS FOR JAPANESE STRAIGHTENING?
Keratin straightening lasts on average three months, provided that certain rules are followed. It is advisable not to tie your hair up in the days following the treatment or to wash your hair too quickly. Do not confuse the keratin straightening method with Japanese straightening, which gives a blow-dry look. This Asian styling changes the structure of the hair by stiffening it for a long time, for up to 6 months.
WHAT TYPE OF HAIR IS COMPATIBLE WITH KERATIN STRAIGHTENING? OUR ADVICE
We distinguish 4 types of hair and they are all compatible with keratin straightening, provided they are not too fine or brittle:
- Type 1 - Straight hair: fine to thick. For those with very fine hair, it is advisable to leave the product on for a shorter time (around 15 min) to avoid damaging it.
- Type 2 - Wavy hair: fine to thick with frizz. Those who spend hours blow-drying their hair to tame their unsightly frizz can opt for Brazilian straightening.
- Type 3 - Curly hair: open to closed curls. The hair scales close thanks to the effect of keratin. This smoothing technique will soften your hairstyle.
- Type 4 - Curly/Afro hair: very closed to curly curls. Keratin straightening is made for you, it will bring softness and finesse to your Afro hair.
How to do keratin straightening? 7 steps to follow to get smooth and silky hair
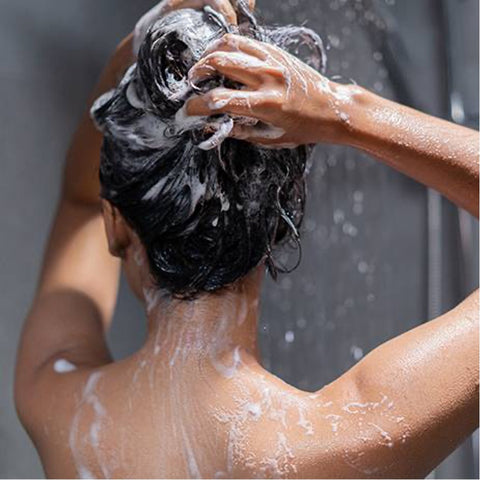
STEP 1: WASH YOUR HAIR SEVERAL TIMES BY KNEADING IT
To ensure the quality of the Brazilian straightening, it is important to follow each step to the letter. Start by washing your hair with a clarifying shampoo. Gently knead your scalp with your fingers without irritating it all the way to the ends to open the scales and stimulate the hair bulb. Rinse until all residue is removed. Repeat the operation a second time to wash them well, then gently wring them out with a terry towel.
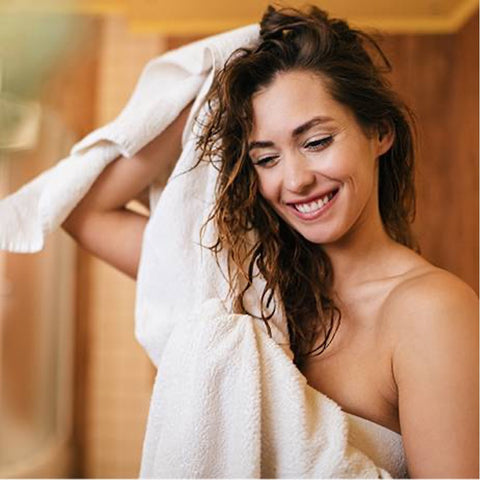
STEP 2: PRE-DRY YOUR HAIR USING A DRYER
Detangle your hair, then use a quality hair dryer to dry it 100%.
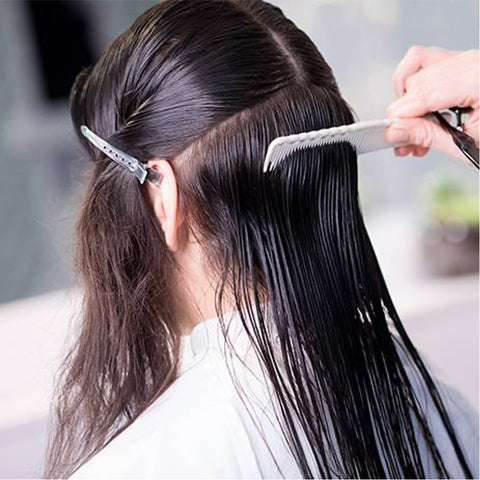
STEP 3: SEPARATE YOUR HAIR INTO 4 PARTS
Before applying the smoothing product, you should divide your hair into 4, respecting the natural parting of your hair. To do this, form a cross at the back of your head using a tail comb. Then, separate each block of hair by attaching them with sectioning clips.

STEP 4: APPLY THE SMOOTHING TREATMENT
Open the windows and protect your hands with gloves before handling, as the product is odorous. Pour the keratin treatment into a bowl. Apply it in small touches with a large brush, strand by strand from the roots to the ends (between 0.5 and 1 cm from the roots), starting at the nape of the neck. Systematically remove any excess with a fine comb to avoid excess product weighing down the hair. Make sure to keep the hair damp throughout this phase.
STEP 5: RESPECT THE PAUSE TIME
Once the miracle product has been applied to all of your hair, respect the break time which varies from 40 to 60 minutes. Respect the break time indicated on the usage protocol and according to your hair type.
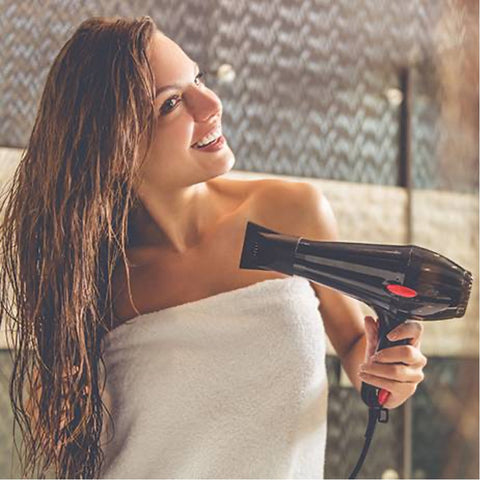
STEP 6: BRUSH YOUR HAIR
Blow-dry your hair using a suitable brush and preferably a professional hairdryer. For medium to long hair, choose a round brush measuring 38 to 53 cm. Short hair and bangs will prefer brushes measuring 19 cm to 25 cm.
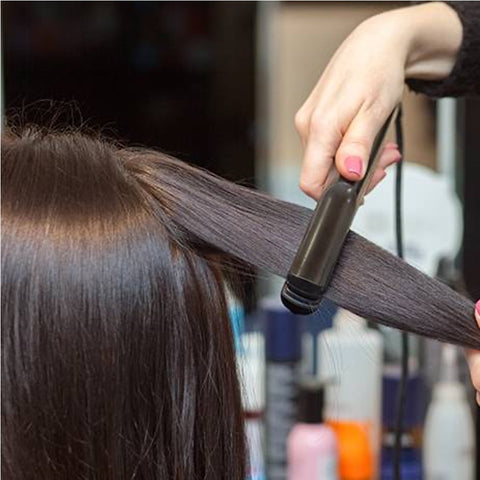
STEP 7: PASS THE HAIR STRAIGHTENER OVER EACH SECTION
This last step allows the keratin to be fixed in your hair in a thermoactive way thanks to the heat. Pass the hair straightener 6 to 8 times on each strand, respecting the temperature indicated according to the brand of the heating device. As an indication:
- Bleached, red or damaged hair: 180 to 200°C.
- Normal hair: 220 to 240°C.